Basque Burnt Cheesecake Recipe: 5 Easy Steps to Creamy Custard Perfection
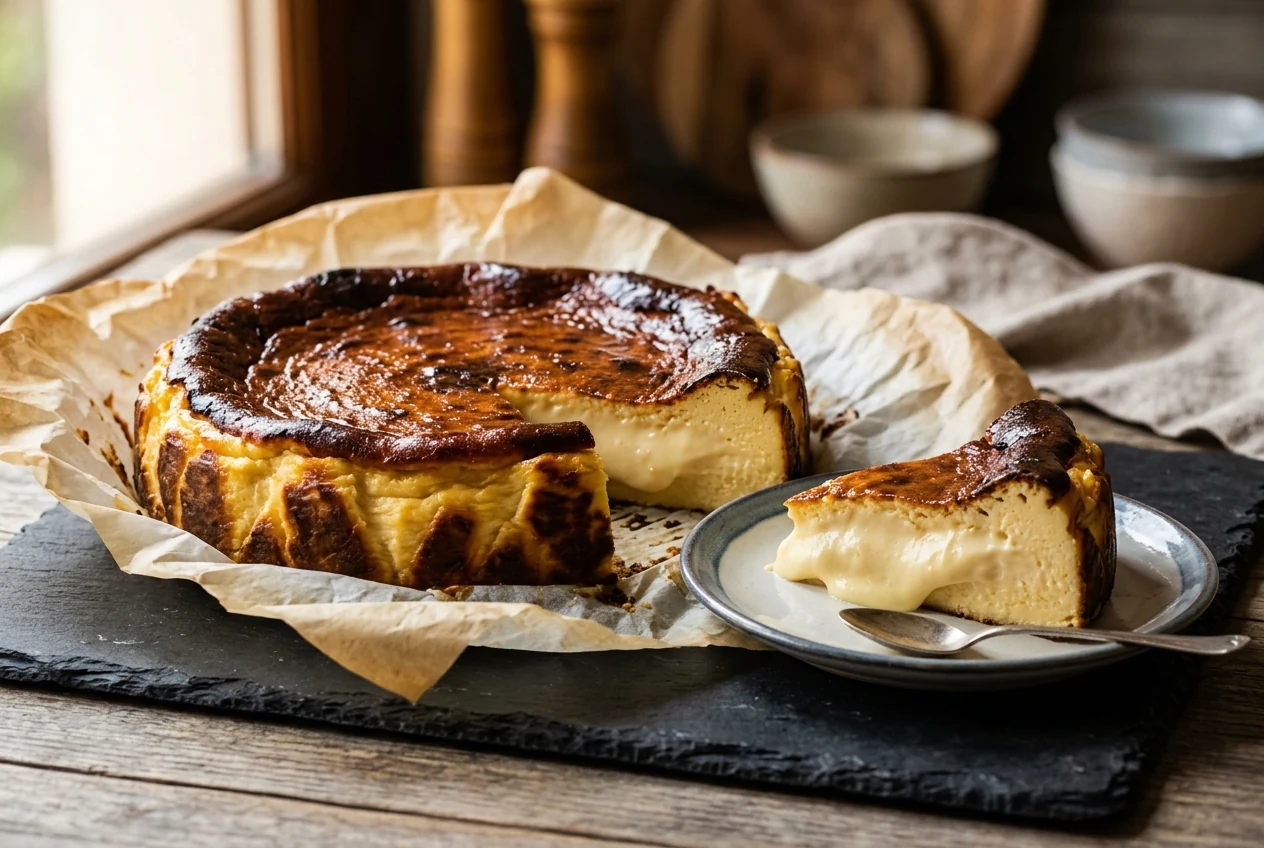
If you are looking for an unforgettable dessert experience that combines culinary drama with pure decadence, this authentic Basque Burnt Cheesecake recipe delivers unmatched results. Known across Spain as Tarta de Queso and famously created in the picturesque coastal streets of San Sebastian at the legendary pintxos bar La Viña, Basque Burnt Cheesecake has captured the imagination of pastry chefs and home bakers worldwide. Unlike traditional dense New York cheesecakes that require delicate water baths and fear surface cracks, this scorched beauty thrives on blistering oven heat, developing a deeply caramelized, bittersweet exterior that encases a silky, custard-like molten center.
Every single bite of Basque Burnt Cheesecake provides a striking textural contrast that dances effortlessly between charred toffee notes and velvety creaminess. Whether you are hosting an elegant dinner party, celebrating a holiday milestone, or expanding your baking repertoire alongside our viral Viral Dubai Chocolate Bar Recipe and our airy Fluffy Japanese Souffle Pancakes, exploring our wide range of treats in the Dessert Recipes Collection on Felis Recipes guarantees you will produce bakery-quality confections every time.
Table of Contents
- The Culinary History of Basque Burnt Cheesecake: From San Sebastian to Global Stardom
- The Food Science Behind the Burnt Top and Molten Center
- Essential Ingredients for the Perfect Basque Burnt Cheesecake
- Baking Time, Temperature and Jiggle Stages for Basque Burnt Cheesecake
- Step-by-Step Instructions: How to Make Basque Burnt Cheesecake
- Nutritional Profile and Health Considerations
- Healthier and Dietary Alternatives for Basque Burnt Cheesecake
- Decadent Serving Suggestions and Beverage Pairings
- Common Mistakes to Avoid with Basque Burnt Cheesecake
- Proper Storage, Chilling and Freezing Guidelines
- Conclusion: Master Your Homemade Basque Burnt Cheesecake
- Frequently Asked Questions About Basque Burnt Cheesecake
The Culinary History of Basque Burnt Cheesecake: From San Sebastian to Global Stardom
The origins of the modern Basque Burnt Cheesecake trace directly back to 1990 in the Old Town of San Sebastian, nestled within Spain’s autonomous Basque Country. Chef Santiago Rivera, proprietor of the famed tavern La Viña on Calle 31 de Agosto, sought to create a simple yet memorable house dessert that did not require elaborate pastry equipment. By stripping away traditional crumb crusts and embracing the natural caramelization of high-heat roasting, Rivera birthed an entirely new category of cheesecake that would eventually revolutionize global dessert menus.
For decades, locals and international gastronomes gathered at La Viña to order slices from dozens of cooling parchment-lined springform pans resting along the bar back. As highlighted in historical chronicles of Basque culinary traditions, the region’s food philosophy prioritizes premium raw ingredients prepared with minimal intervention to celebrate pure flavor. When food media and culinary travelers began sharing photographs of the blackened, molten dessert online, Basque Burnt Cheesecake quickly transformed into an international viral sensation, celebrated in artisan patisseries from Tokyo and London to New York and Paris.
Today, home cooks revere this masterpiece because it eliminates the most intimidating aspects of classic baking. There is no blind-baking of pastry shells, no troublesome water baths prone to leaking, and no anxiety over cosmetic cracking. In fact, dramatic unevenness and blistered folds are precisely what make an authentic Basque Burnt Cheesecake so visually arresting and delicious.
The Food Science Behind the Burnt Top and Molten Center
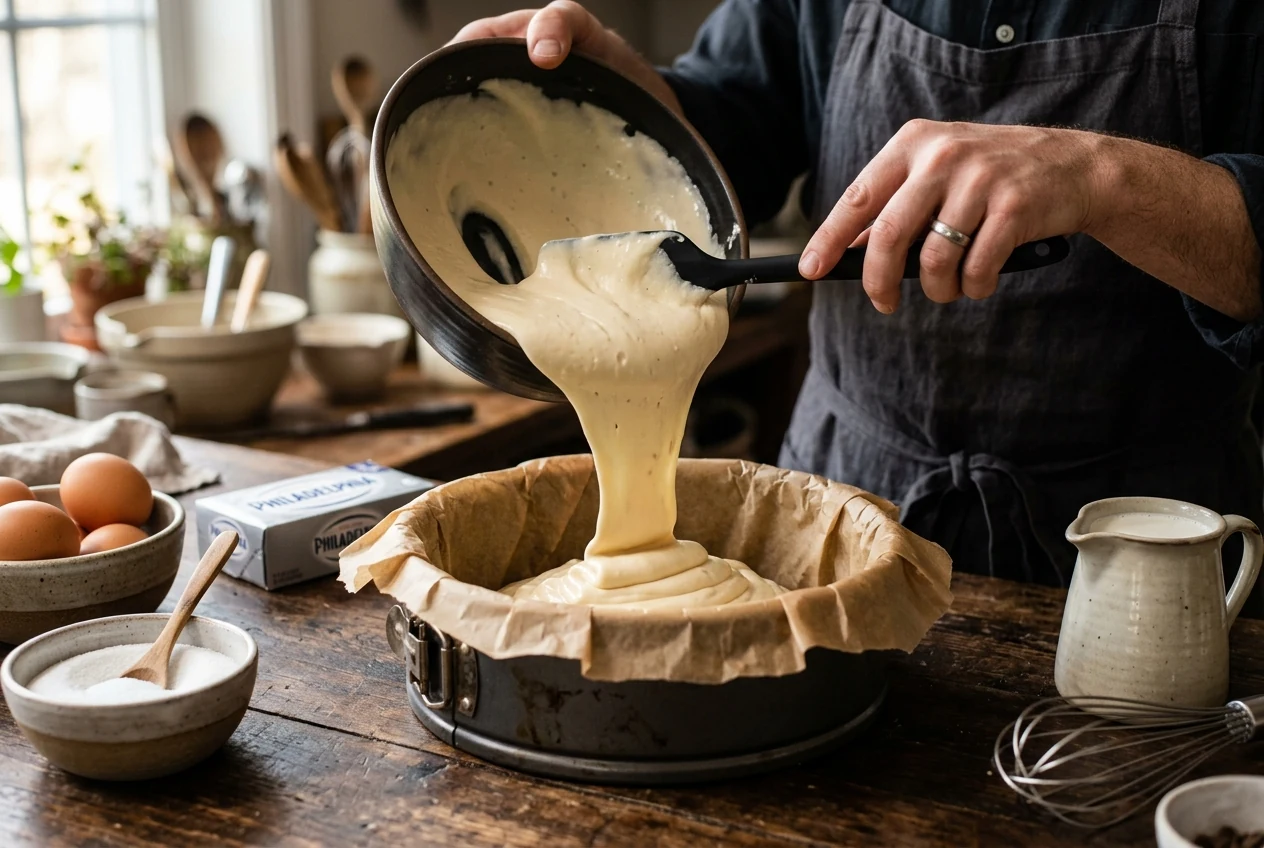
Understanding why Basque Burnt Cheesecake behaves so differently from standard baked custards requires an appreciation of thermal culinary physics. Conventional cheesecakes are baked gently at low temperatures (around 300°F or 150°C) inside a protective bain-marie water bath. This gentle cooking environment prevents the egg proteins from curdling and keeps the surface uniformly pale and flat.
In contrast, Basque Burnt Cheesecake is blasted with intense heat ranging from 400°F to 425°F (200°C to 220°C). Under this extreme thermal environment, two essential chemical reactions occur simultaneously on the surface: the Maillard reaction and sugar pyrolysis (caramelization). As documented by food chemistry authorities at Serious Eats pastry science, dairy proteins (casein and whey) interact with lactose and sucrose molecules to produce hundreds of complex aroma compounds. These create rich flavors of toasted hazelnut, browned butter, dark maple, and crème brûlée without tasting bitter or acrid.
While the exterior rapidly caramelizes and creates a sturdy crust, the internal heat penetration remains remarkably slow. The dense fat content of cream cheese and heavy whipping cream buffers the center, preventing the internal core from exceeding 150°F to 155°F (65°C to 68°C). Consequently, the interior egg custard sets gently into a silky, spoonable texture that remains unctuous and molten when sliced at room temperature.
Essential Ingredients for the Perfect Basque Burnt Cheesecake
The beauty of an authentic Basque Burnt Cheesecake lies in its short, unpretentious ingredient list. Because there are no graham cracker crusts or fruit glazes to mask imperfections, each component must be of the highest quality. Let us inspect the functional role of each staple:
- Full-Fat Brick Cream Cheese: The backbone of the structure. Always select regular block cream cheese rather than whipped tub varieties, which contain excess water and stabilizers that prevent proper custard coagulation. Full-fat dairy provides the essential lipid emulsion required for that signature velvet mouthfeel.
- Granulated White Sugar: Sugar does more than impart sweetness; it actively influences texture. By binding with water molecules, sugar lowers the water activity in the batter, delaying egg protein coagulation and preventing the cheesecake from becoming rubbery under high heat.
- Farm-Fresh Grade-A Eggs: Eggs provide structure, richness, and leavening. As the proteins gently set in the oven, they trap moisture to form a delicate custard matrix. Room temperature eggs emulsify seamlessly without causing the cream cheese to seize.
- Heavy Whipping Cream (36% Milkfat): Heavy cream loosens the batter, creating a pourable consistency that bakes into an impossibly lush, custardy core. Sourcing pure heavy cream with high butterfat content ensures a decadent result, consistent with nutritional guidelines from USDA FoodData Central.
- All-Purpose Flour or Cornstarch: A very modest amount of starch acts as insurance against weeping and separation. The starch granules absorb free liquids and swell, reinforcing the custard structure without making the cake heavy or bready.
- Pure Vanilla Bean Paste and Fine Sea Salt: A generous splash of aromatic vanilla and a measured pinch of mineral sea salt elevate the dairy notes and harmonize the bitter-sweet caramelized crust.
Below is the detailed measurement breakdown and substitution guide for your preparation:
| Ingredient | Precise Amount | Substitution Options |
|---|---|---|
| Full-Fat Cream Cheese (Block) | 2 lbs (900g / 4 blocks) | Spanish Mascarpone or Philadelphia Original |
| Granulated Sugar | 1 1/2 cups (300g) | Superfine caster sugar or organic cane sugar |
| Large Eggs (Room Temp) | 6 large eggs | 5 extra-large eggs |
| Heavy Whipping Cream (36%+) | 2 cups (480ml) | Double cream (UK) or Crème fraîche (diluted) |
| All-Purpose Flour | 1/3 cup (40g) | Cornstarch or 1-to-1 Gluten-Free Flour |
| Pure Vanilla Bean Paste | 1 tbsp (15ml) | Pure vanilla extract or 1 vanilla bean scraped |
| Fine Sea Salt | 1 tsp (5g) | Kosher salt or flaky Maldon salt |
Baking Time, Temperature and Jiggle Stages for Basque Burnt Cheesecake
Mastering the oven timing is the single most critical aspect of creating a showstopping Basque Burnt Cheesecake. Because ovens calibrate differently, visual cues and tactile testing are far more reliable than a strict timer alone. Knowing what to observe through the oven door ensures your cheesecake attains the desired scorched crown without over-cooking the delicate custard interior.
Consult this reference guide to navigate the distinct visual transformations during baking:
| Baking Stage | Oven Temp & Time Window | Visual Cue & Internal Texture |
|---|---|---|
| Initial Rise & Souffléing | 400°F (200°C) | Minutes 0 to 25 | Edges puff up above the parchment rim; surface turns glossy pale yellow; no browning yet. |
| Maillard Browning & Blistering | 400°F (200°C) | Minutes 25 to 40 | Caramel spots emerge across the top; edges turn rich golden amber; pleasant toffee aroma develops. |
| Scorched Crown & Custard Jiggle | 400°F (200°C) | Minutes 40 to 52 | Top turns deep dark mahogany with charred blisters; center has a pronounced, wave-like jiggle when gently shaken. |
| Room-Temp Settling & Wrinkling | Cooling Rack | Hours 0 to 3 | Puffed dome slowly collapses into rustic ripples; internal steam gently sets the core into a creamy custard. |
Step-by-Step Instructions: How to Make Basque Burnt Cheesecake
Follow these five comprehensive, baker-tested steps to craft the ultimate Basque Burnt Cheesecake with complete confidence.
Step 1: Prep the Oven and Double-Line the Springform Pan
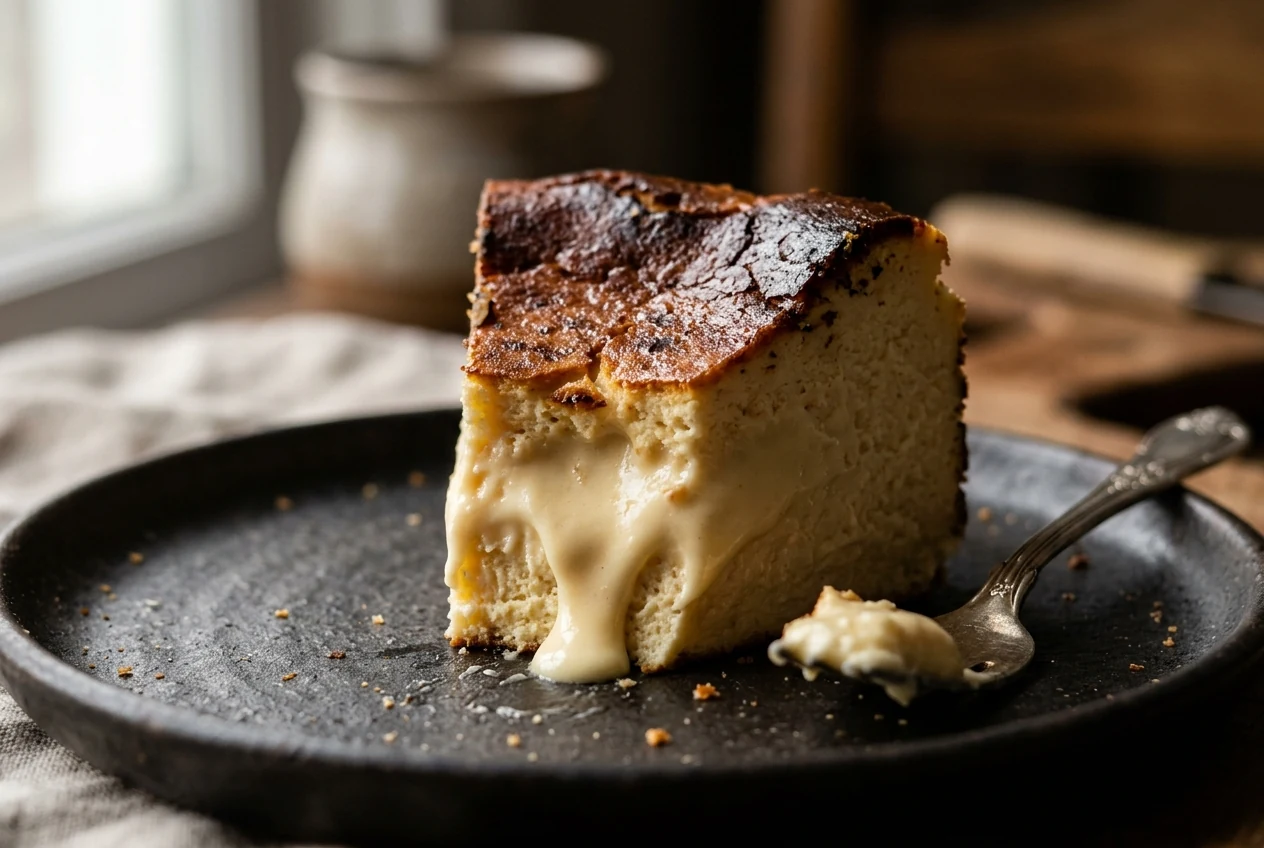
Preheat your oven to 400°F (200°C) on convection bake mode, or 425°F (220°C) if using standard conventional bake. Position the oven rack right in the center to allow maximum convective air circulation around the cake. Lightly smear a 9-inch or 10-inch springform pan with butter. Take two large sheets of parchment paper (about 12×16 inches each). Crumple the first sheet into a tight ball with your hands, then smooth it out; this softens the paper fibers and allows it to hug the contours of the pan without tearing. Press the crumpled sheet down into the pan, allowing the rustic edges to extend at least 2 inches above the rim. Repeat with the second sheet placed perpendicularly across the first, creating full, leak-proof double coverage.
Step 2: Beat the Softened Cream Cheese and Granulated Sugar
Place your completely room-temperature cream cheese and granulated sugar into a stand mixer fitted with the paddle attachment. Mix on medium-low speed for 3 to 4 minutes. Do not whip at high speed; incorporating excessive air can cause the cheesecake to balloon excessively and deflate into a sunken crater. Stop the mixer twice to scrape down the sides and base of the bowl with a flexible silicone spatula, ensuring no stubborn clumps of cream cheese remain. The mixture should look velvety smooth, glossy, and homogeneous.
Step 3: Incorporate Eggs One at a Time for Maximum Emulsion
Reduce the mixer speed to low. Crack your room-temperature eggs into a liquid measuring cup. Add the eggs into the cream cheese mixture one at a time, allowing each egg to be fully absorbed before adding the next (about 20 seconds per egg). This gentle, sequential emulsification prevents the batter from breaking or curdling, ensuring the rich lipids and egg proteins combine into a sturdy custard suspension.
Step 4: Stream in Cream, Vanilla, Salt and Sifted Flour
With the mixer still running on low speed, slowly pour in the heavy whipping cream in a steady stream. Add the pure vanilla bean paste and fine sea salt. Once blended, sift the all-purpose flour over the bowl using a fine-mesh strainer. Switch to a manual silicone spatula and gently fold the flour into the batter by hand using sweeping circular motions until zero streaks of dry flour are visible. For absolute pastry-shop perfection, pour the finished batter through a fine sieve into your parchment-lined pan, popping any large air bubbles that float to the top.
Step 5: High-Heat Scorching and Proper Cooling
Carefully transfer the filled pan to your preheated oven. Bake for 50 to 55 minutes. Keep an eye on the cake during the final 10 minutes: you want the top to turn deeply bronzed and mahogany-dark with blistered edges like a crème brûlée. Gently tap the side of the pan with an oven mitt; the outer 2 inches should appear softly set, while the inner 4 inches should jiggle dramatically like loose gelatin. Remove from the oven and place immediately on a wire cooling rack. The cake will settle as it cools. Allow it to rest at room temperature for at least 3 to 4 hours before unclamping the springform ring and peeling away the parchment paper.
Nutritional Profile and Health Considerations
A classic Spanish Basque Burnt Cheesecake is undoubtedly a celebratory, rich dessert meant to be savored mindfully. Packed with wholesome dairy fats from cream cheese and heavy cream, along with bioavailable protein from farm-fresh eggs, it provides a dense, energy-rich treat. Unlike many commercial bakery cakes laden with artificial preservatives, hydrogenated trans fats, and corn syrups, this scratch-made recipe uses purely natural pantry ingredients.
Here is the nutritional breakdown per standard serving (calculated for 1 slice out of a 10-serving yield):
| Nutrient Element | Amount per Serving (1 Slice) |
|---|---|
| Calories | 465 kcal |
| Total Fat | 36 g |
| Saturated Fat | 22 g |
| Cholesterol | 185 mg |
| Sodium | 340 mg |
| Total Carbohydrates | 31 g |
| Dietary Fiber | 0 g |
| Total Sugars | 28 g |
| Protein | 8 g |
| Calcium | 120 mg |
| Iron | 1.1 mg |
Healthier and Dietary Alternatives for Basque Burnt Cheesecake
One of the remarkable qualities of Basque Burnt Cheesecake is how easily it adapts to various dietary preferences without losing its iconic scorched crust and custardy heart. Here are tested modifications for special diets:
- Keto and Low-Carb Version: Replace the granulated sugar with an equal measure (1 1/2 cups) of granulated allulose or an erythritol-monk fruit baking blend. Allulose is particularly effective because, unlike other sugar substitutes, it actively caramelizes under heat, producing the authentic mahogany top without glycemic spikes. Substitute the all-purpose flour with 2 tablespoons of coconut flour or 1/4 cup of superfine almond flour.
- Certified Gluten-Free Adaptation: Swap the all-purpose flour for a 1-to-1 gluten-free baking blend or an equal weight of pure cornstarch (tapioca starch also works wonderfully). Because there is no gluten development needed in a custard cake, gluten-free versions are virtually indistinguishable from the traditional original.
- Lactose-Free Option: Utilize certified lactose-free cream cheese blocks (such as Green Valley Organics) and substitute the heavy cream with lactose-free heavy whipping cream or full-fat canned coconut cream. The resulting texture remains luxuriously thick and decadent.
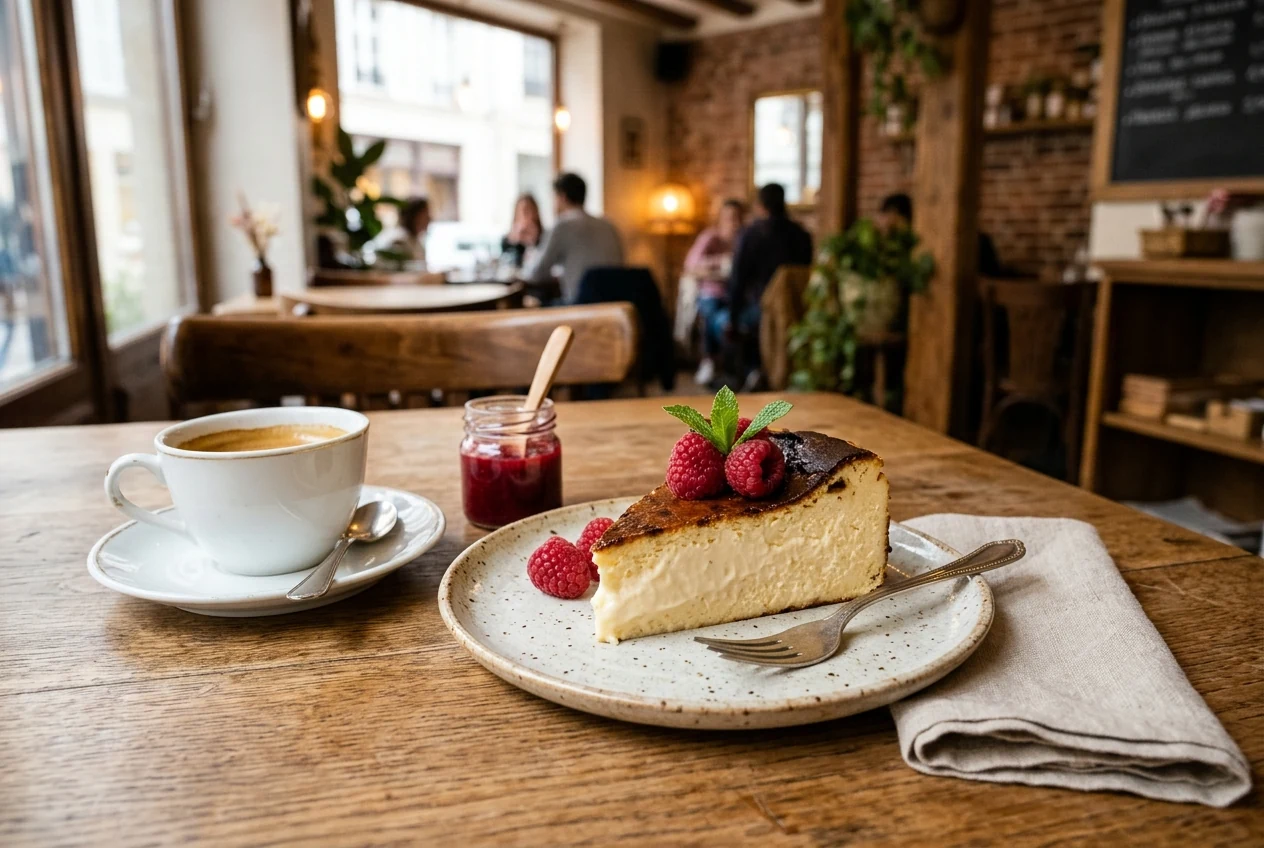
Decadent Serving Suggestions and Beverage Pairings
In San Sebastian, a slice of Basque Burnt Cheesecake is frequently enjoyed unadorned at room temperature alongside a glass of local Basque cider (Sagardoa) or a chilled glass of sweet Pedro Ximénez sherry. The complex raisins and dried fig notes in fortified wines echo the caramelized crust of the cake with breathtaking elegance.
If you prefer non-alcoholic pairings, a freshly brewed double espresso or an Americano offers a clean, roasted bitterness that cuts through the rich dairy fats. For a vibrant fruit contrast, spoon a warm compote of fresh blackberries, tart raspberries, or passion fruit pulp over the plate. A light sprinkle of flaky Maldon sea salt across the burnt surface adds a subtle mineral crunch that elevates the sweet caramel profile to Michelin-star heights.
Pair this showpiece dessert with our cozy Campfire Smores Cones when hosting backyard gatherings to create a memorable sweet spread that delights guests of all ages.
Common Mistakes to Avoid with Basque Burnt Cheesecake
While this recipe is celebrated for its forgiving nature, a few subtle pitfalls can stand between a mediocre cake and a transcendent dessert. Keep these expert tips in mind:
- Using Cold Ingredients: Mixing cream cheese straight from the refrigerator guarantees an uneven batter filled with stubborn white lumps. Allow cream cheese, eggs, and cream to sit on the counter for at least 2 hours before baking.
- Over-Baking into a Solid Cake: If you wait until the center appears completely firm in the oven, your cheesecake will turn dry and sponge-like upon cooling. The center MUST jiggle vigorously when nudged; residual heat carries over to set the custard perfectly.
- Slicing While Warm: Cutting into the cheesecake while it remains warm from the oven will cause the molten center to collapse into a liquid pool. Always allow the cake to cool to room temperature (at least 3 hours) so the fats can stabilize into a velvety cream.
- Skimping on Parchment Paper: A single thin sheet of baking paper can tear or allow batter to leak through the springform base. Always use double sheets and crumple them beforehand to create a durable, non-stick barrier.
- Whipping on High Speed: Beating the batter on high speed whips excess air into the mixture. When baked at high heat, the trapped air expands violently, causing the cheesecake to balloon over the pan and collapse with wide cracks. Keep mixer speeds on low to medium-low at all times.
Proper Storage, Chilling and Freezing Guidelines
One of the greatest advantages of Basque Burnt Cheesecake is its versatility in storage and make-ahead convenience. How you store it also dictates the sensory experience of every slice:
- Room Temperature Serving (Ultra-Creamy): If you plan to serve the cake on the day of baking, keep it covered at cool room temperature for up to 6 hours after cooling. This preserves the ultra-soft, spoonable molten custard center.
- Refrigeration (Clean Bakery Slices): For clean, sharp knife slices, chill the cooled cheesecake in the refrigerator for at least 4 hours (or overnight). The dairy fats solidify into a silky, dense fudge-like texture. Covered tightly in plastic wrap, the cake remains fresh and delicious for up to 5 days. For the best of both worlds, slice it cold, then let the slices sit on the plate for 20 minutes before serving.
- Freezing Individual Portions: You can freeze whole cakes or individual slices with outstanding success. Wrap chilled slices tightly in a double layer of plastic wrap followed by aluminum foil. Freeze for up to 2 months. Thaw overnight in the refrigerator before enjoying.
Conclusion: Master Your Homemade Basque Burnt Cheesecake
Baking an authentic Basque Burnt Cheesecake at home is an exhilarating culinary triumph. By trading timid low-temperature water baths for bold, blistering oven caramelization, you create a rustic centerpiece that looks as magnificent as it tastes. With its signature scorched crown, comforting notes of toffee, and an irresistibly creamy custard center that melts on the tongue, this San Sebastian classic is guaranteed to become one of your most requested desserts.
Gather your premium ingredients, crank up your oven, and enjoy the magical transformation. Once you have tasted the authentic perfection of this homemade Basque Burnt Cheesecake, please leave a 5-star rating and share your baking results in the comments below!
Frequently Asked Questions About Basque Burnt Cheesecake
Why is my Basque Burnt Cheesecake not browning on top?
If your cheesecake has been baking for 40 minutes and remains pale, your oven temperature may be running low. Increase the heat to 425°F (220°C) or switch on the top broiler element for the final 3 to 5 minutes of baking. Keep a close watch through the oven door to achieve a deep golden mahogany shade without turning into black ash.
Can I make Basque Burnt Cheesecake without a springform pan?
Yes. While a 9-inch or 10-inch springform pan offers the easiest release, you can also bake this recipe in a 9×3-inch round cake pan or a deep cast-iron skillet. Ensure the crumpled parchment paper extends at least 2 inches above the rim on all sides so you can use the paper overhang as handles to gently lift the cake out once thoroughly chilled.
Is the top of Basque Burnt Cheesecake actually burnt or bitter?
Despite its dramatic name, an authentic Basque Burnt Cheesecake is not acrid or bitter. The high oven heat caramelizes the natural dairy sugars and egg proteins through the Maillard reaction, resulting in rich, complex flavors reminiscent of toasted marshmallows, browned butter, and the crackling sugar crust of crème brûlée.
How do I achieve clean, bakery-style slices?
To cut pristine, professional slices, chill the cheesecake thoroughly in the refrigerator for at least 4 hours. Run a large, sharp chef knife under hot running water for 10 seconds, wipe it dry with a clean kitchen towel, and slice through the cake in a single, confident downward motion. Wipe the blade completely clean after every single cut.
Can I make Basque Burnt Cheesecake ahead of time?
Absolutely. Basque Burnt Cheesecake actually tastes even better on the second day as the rich flavors have time to meld and mature. Bake the cake the day before your gathering, cool it to room temperature, and refrigerate overnight. Remove it from the fridge 30 to 45 minutes prior to serving to restore its luscious custard softness.
PrintBasque Burnt Cheesecake
- Total Time: 1 hr 5 mins
- Yield: 10 to 12 servings 1x
Description
Authentic Basque Burnt Cheesecake featuring a deeply caramelized, scorched crust and a luxuriously smooth, melt-in-your-mouth custardy molten center. Made with rich cream cheese, heavy cream, and farm eggs for the ultimate San Sebastian dessert experience.
Ingredients
- 2 pounds (900g / four 8-oz blocks) full-fat cream cheese, completely softened to room temperature
- 1 1/2 cups (300g) granulated white sugar
- 6 large Grade-A eggs, room temperature
- 2 cups (480ml) heavy whipping cream (minimum 36% milkfat), room temperature
- 1 tablespoon pure vanilla bean paste or high-grade vanilla extract
- 1 teaspoon fine sea salt (balances rich sweetness)
- 1/3 cup (40g) all-purpose flour or cornstarch, thoroughly sifted
- Unsalted butter, for greasing the springform pan
- 2 large sheets of unbleached parchment paper, for lining the pan
Instructions
- Oven & Pan Preparation: Position an oven rack in the center position and preheat your oven to 400°F (200°C) with convection fan, or 425°F (220°C) standard conventional bake. Lightly grease a 9-inch or 10-inch round springform cake pan with butter. Press one large sheet of parchment paper down into the pan, allowing the excess to pleat and rise at least 2 inches above the rim. Press a second sheet perpendicular to the first to create double rustic coverage.
- Beat Cream Cheese & Sugar: In a large stand mixer bowl fitted with the paddle attachment (or using an electric hand mixer on medium-low speed), beat the softened cream cheese and granulated sugar together for 3 to 4 minutes until perfectly smooth, glossy, and lump-free. Scrape down the sides and bottom of the bowl frequently.
- Incorporate Eggs Individually: With the mixer running on low speed, add the room temperature eggs one at a time, mixing just until each yolk is fully emulsified before adding the next. This prevents aerating the batter with unwanted large air pockets.
- Stream in Heavy Cream, Vanilla & Salt: Pour in the heavy cream in a steady, slow stream while mixing on low speed. Add the vanilla bean paste and fine sea salt, blending until fully homogeneous and silky.
- Sift in Flour: Sift the all-purpose flour directly over the batter. Gently fold with a flexible silicone spatula from the bottom up until no dry pockets remain. Pour the batter through a fine-mesh sieve directly into the prepared parchment-lined pan to remove any stray micro-bubbles.
- High-Heat Baking: Transfer the pan to the preheated oven. Bake for 50 to 55 minutes until the top develops a deep, glossy mahogany-brown caramelized crust with blistered edges, while the center retains a dramatic, custard-like wobble when the pan is gently nudged.
- Cooling & Setting: Remove the cheesecake from the oven and set it on a wire cooling rack. The puffed crown will slowly settle and wrinkle. Allow it to cool completely in the pan at room temperature for at least 3 to 4 hours. For an ultra-molten center, slice and serve at cool room temperature; for clean bakery slices, chill in the refrigerator for at least 4 hours.
Notes
Ensure all dairy and egg ingredients are strictly at room temperature before mixing to prevent curdling or stubborn lumps. The iconic scorched top provides rich toffee, caramel, and crème brûlée flavor notes without any acrid bitterness.
- Prep Time: 15 mins
- Cook Time: 50 mins
- Category: Dessert
- Cuisine: Spanish / Basque

